As the manager of an incredible team, you needed a way for them to request files from clients easily, efficiently, and remotely.
Through your research, you came across Dropbox file request, and you’re now ready and excited to get started with your new account.
Kudos to you, by the way. Dropbox is one of the leading file-sharing solutions out there.
It’s been around for a decade now, and they recently released a feature that could solve your challenges as a team when it comes to managing client files.
But, just before you transition to your new account, let’s cover together the key things you need to know to best out of the tool and transform your client management.
In this article, I am giving you an in-depth review of Dropbox file request for B2B companies and how you can manage files for your Dropbox business team.
Ready? Let’s jump right into it!
For those who are not very familiar with Dropbox, here is a quick overview of the platform.
Dropbox is a file-sharing software, allowing you to send and receive files from anyone into online folders.
You can use it to organize images, documents, or any type of files online and access them from any device.
Here is a video presentation of Dropbox, as you can see, it’s all about files organization.
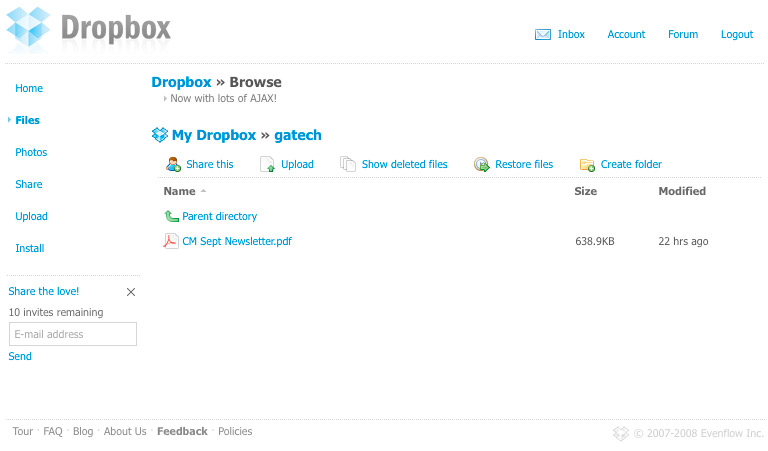
And for those who know exactly what Dropbox does, here is something you probably didn’t know. In 2008, the first version of their website looked like this—as you could only install it back then.
Dropbox plans fall under 2 main categories: Personal and Business plans:
Personal plans are designed for individuals like you and me, while Business plans are more suitable for companies.
Within each category, you have several tiers based on your needs.
Since we’re focusing in this article on B2B companies, I assume that you manage a small to medium-sized team.
So based on that, the Dropbox plan that would suit your needs is the Business Standard Plan.

The Business Standard Plan is around €864/year (VAT included) if you needed 5 user seats in total.
And with this plan, you will get of course the generic file-sharing module that Dropbox offers.
On top of that, you’ll also have access to the Dropbox features like file request and HelloSign allowing you to send three documents for signature every month.
That being said, let’s move on to the actual setup of your brand-new Dropbox account.
If you haven’t done it yet, log back into your Dropbox account to set it up for your team.
From the top right of your account, you can access customization options to transform your account into a business center.
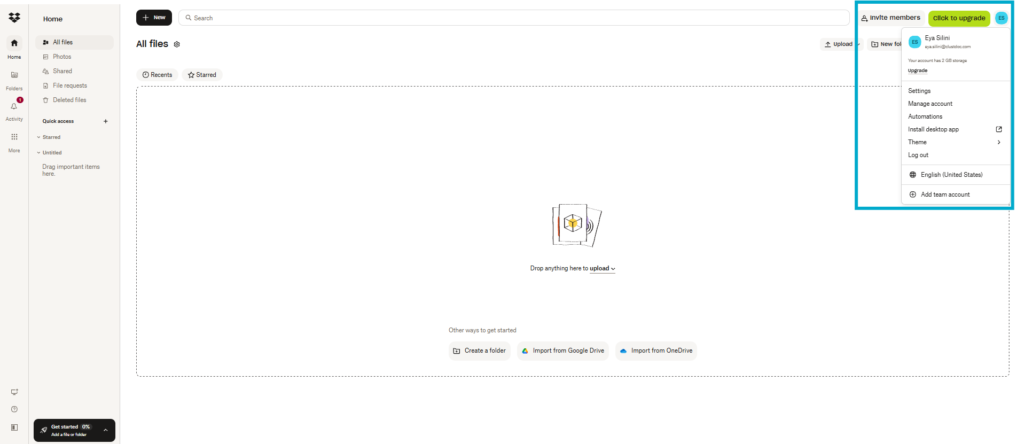
• Adding your company logo
• Inviting your teammates
• Managing your billing
• Connecting your Dropbox account with any other app you might be using
• Managing your password and user access security
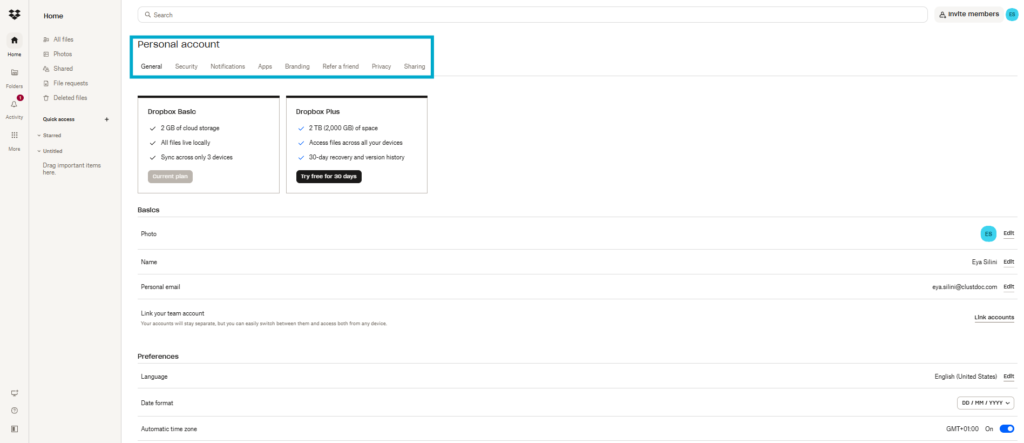
Once you’ve updated all available options to match your branding and needs, you’re ready to get started with your file request work.
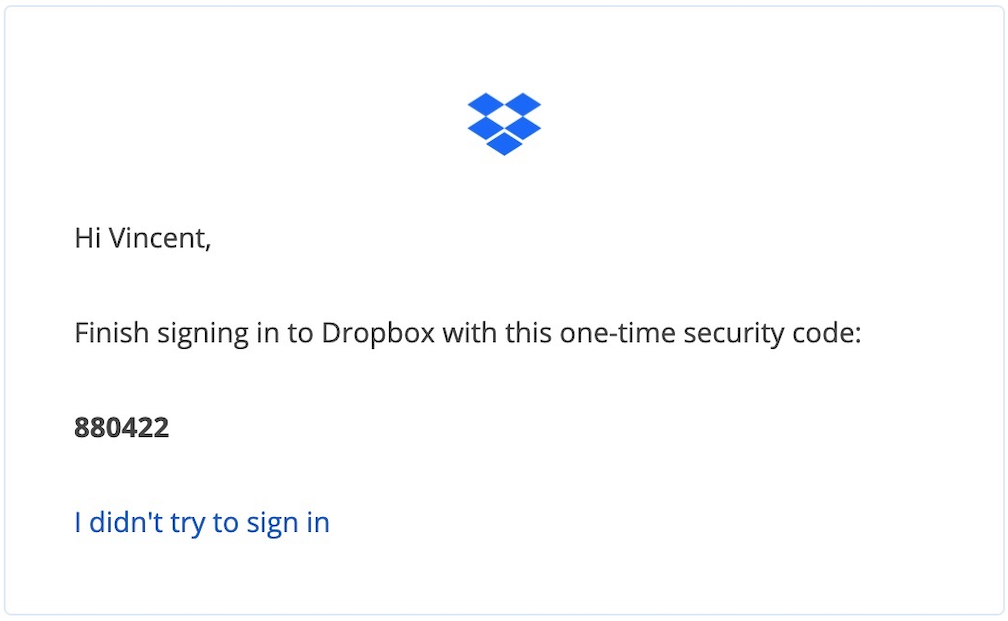
Before you move forward, make sure you verify your email address. When you registered to your new account, you should have received a verification email.
Click into this email to verify your address and unlock your account, otherwise, the next steps will not be possible.
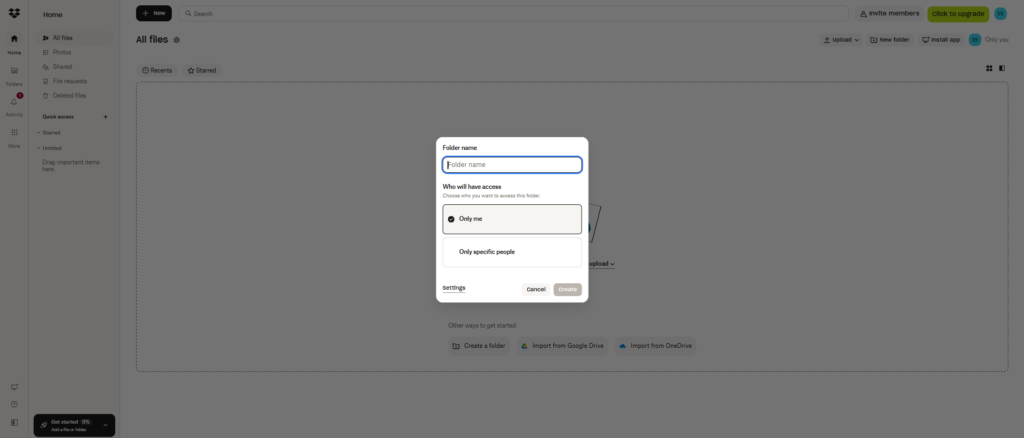
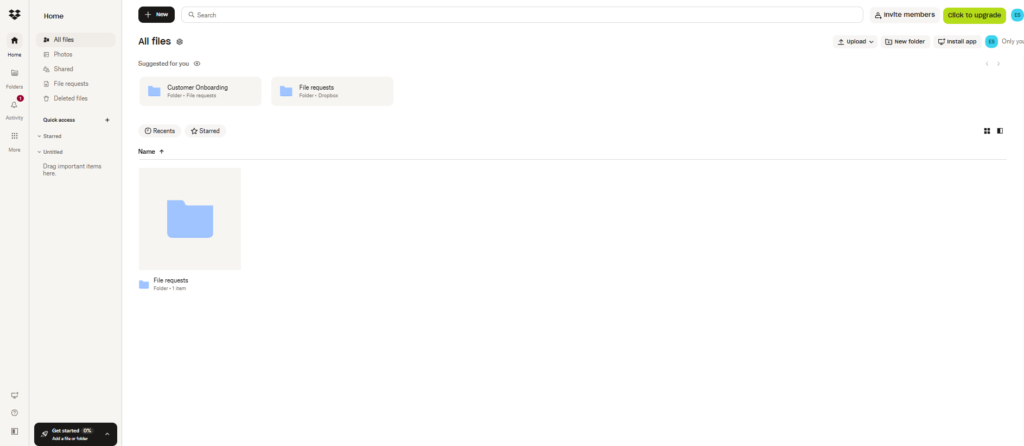
When starting with a new tool, it’s always a good idea to take a tour and play with it. That’s why I suggest creating a new folder first before you jump to the File Request section of the app.
And you’ll see next that this folder will actually be useful when we get started.
In the sidebar, click on ‘All files’- even if we’re here to create a folder, then click on the “Create New” button.
Then, it’s up to you: you can create a regular folder or a shared folder if you want this to be accessible by your team.
Now that you’re top of your Dropbox game. We can move forward.
Most of the features available to you are accessible from the main sidebar menu of your account.
I’m sure, that you’ve already located the File Request tab by now, so yes, go ahead and click on it.
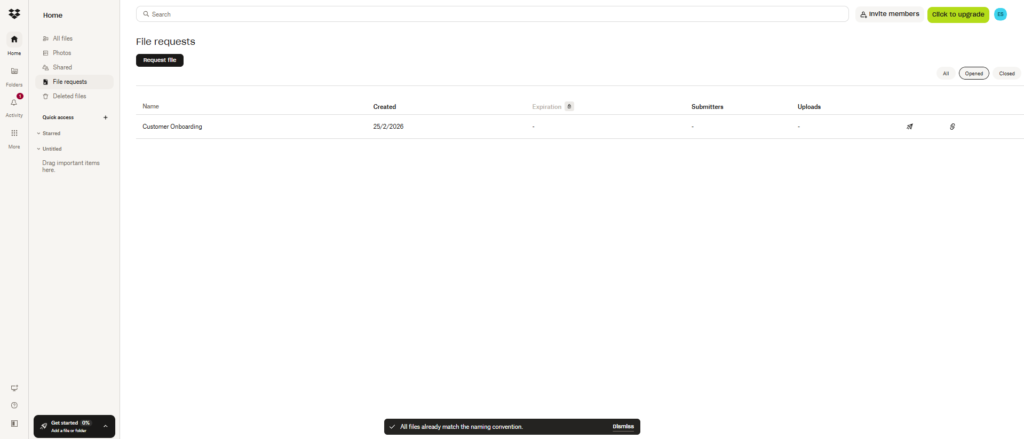
he welcome screen looks like this. The page is empty, but not for too long. Once you’ve started using the File request feature, your history will show right there.
Click on the “New request” button located at the top of the page to start. You’re now about to request new files from a client.
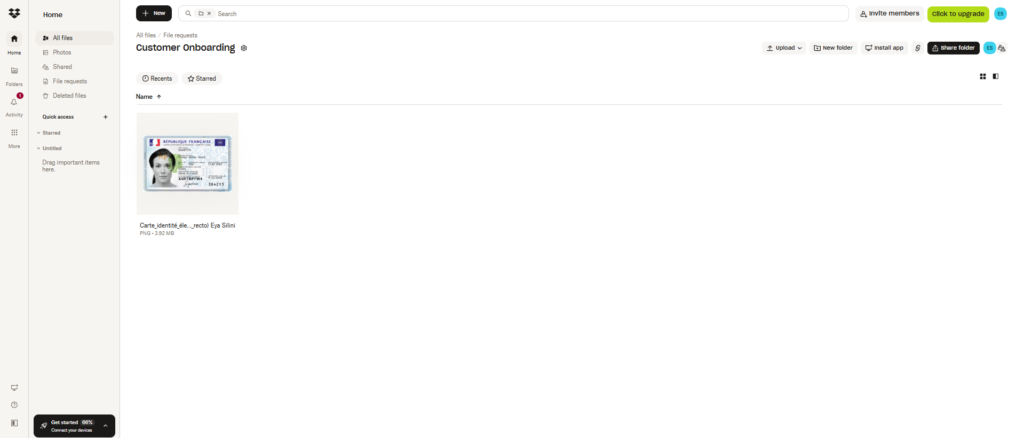
So let’s say that you work at a fancy web design agency, and you need digital assets from your client in order to work on their project.
You’re going to fill out the project details as such:
– Title: The name of the project or the general description of what you need
– Description: Some instructions for your client.
You could definitely be more precise and add the file format you’ll need or share as much information as possible for your client to understand exactly what needs to be submitted.
– The due date: When you need this by
– Late Upload: Y/N
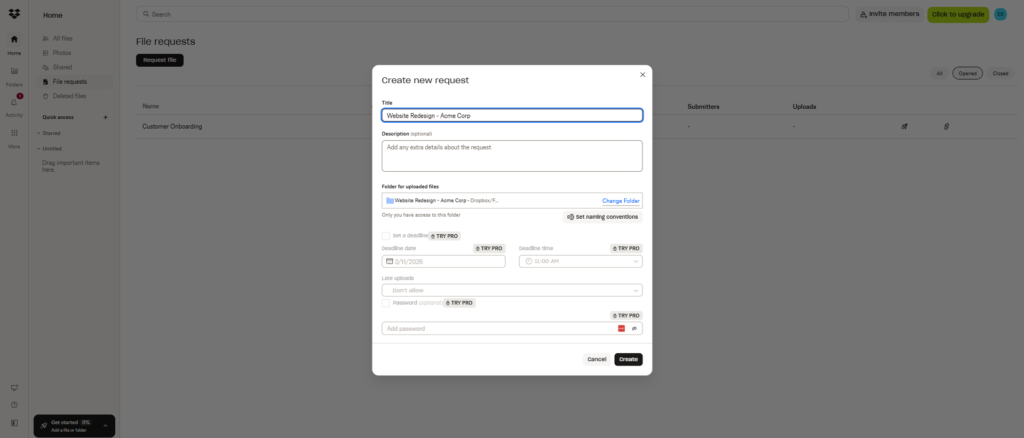
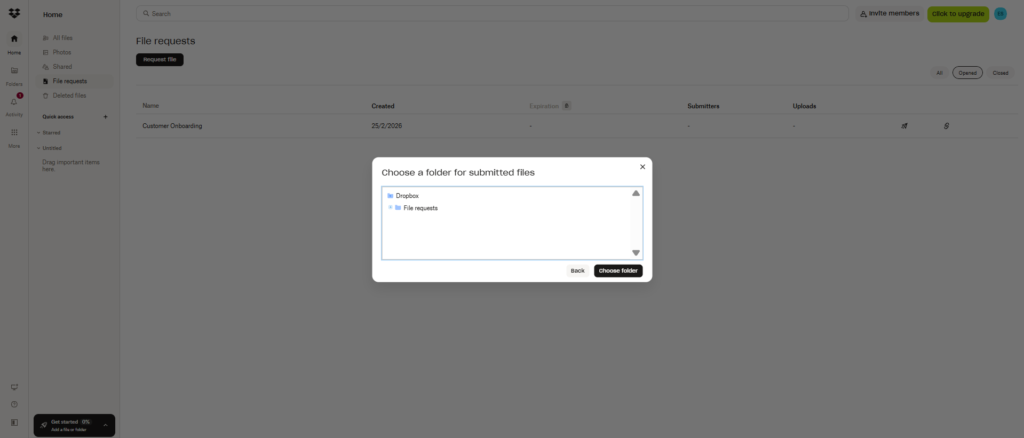
Of course, since you’ve created a test folder with us previously (Mine was called “Website Redesign – Acme Corp), you can even click on ‘Change folder’ and select a destination folder right away.
Once you’re done, you’re going to add your contact email address and a message or grab the public URL to your folder and send it to your contact using the channel you prefer (Eg.outside of Dropbox).
Voilà!
On your side, once you’ve created a file request, you’ll receive an automatic email from Dropbox. If you clicked in this email, you’d be redirected to your Dropbox account File Request tab.
Your contact (In our case, Eya) will receive an email notification with your email message enclosed to it.
The text available above the Call-to-action button is automatically generated by Dropbox.
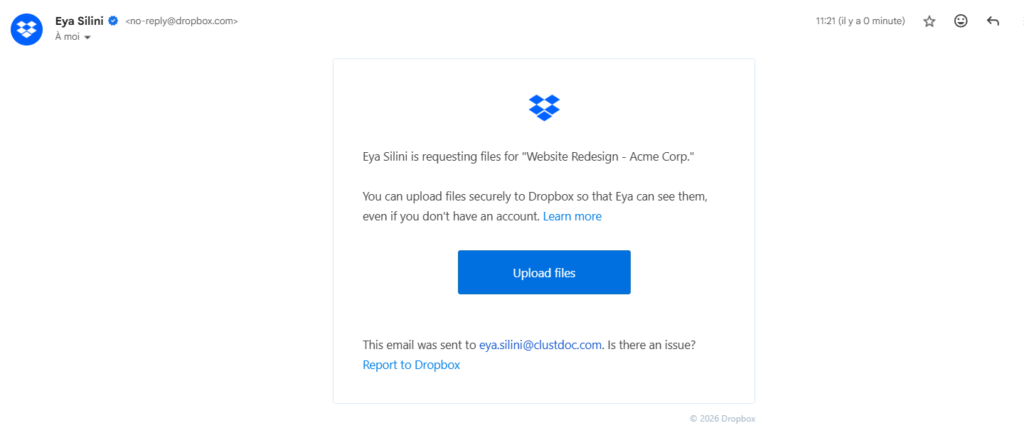
Once your client clicks on the ‘Upload files’ button, they will be redirected to the online interface where the file upload can be done.
Of course, if you decided to send directly through your email inbox the access link to this interface, the client would also land there directly without receiving the above email from Dropbox.
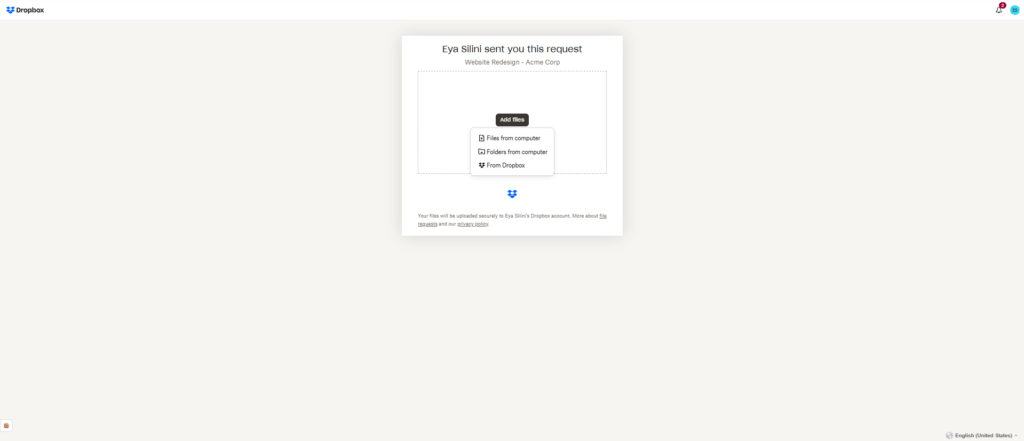
Now, let’s discover how the file request page looks like for your client.

As you can see, there is no need to have a Dropbox account to access this page as a sender.
Your client can easily upload the following information:
– Files saved on their laptop
– Folders created on their device
– Or Dropbox assets
The last option is suitable for anyone also using Dropbox to store their files. By clicking on this last option, they will only be required to log in to select the files they want to share with you.
Now back to the file upload.
Once the client has selected or dragged and dropped their files, Dropbox will ask for their details to move forward.
If they don’t add their details, the file request will not be completed.
And once all files are successfully uploaded, your client gets a ‘Thank you’ screen and can always upload more files if needed.
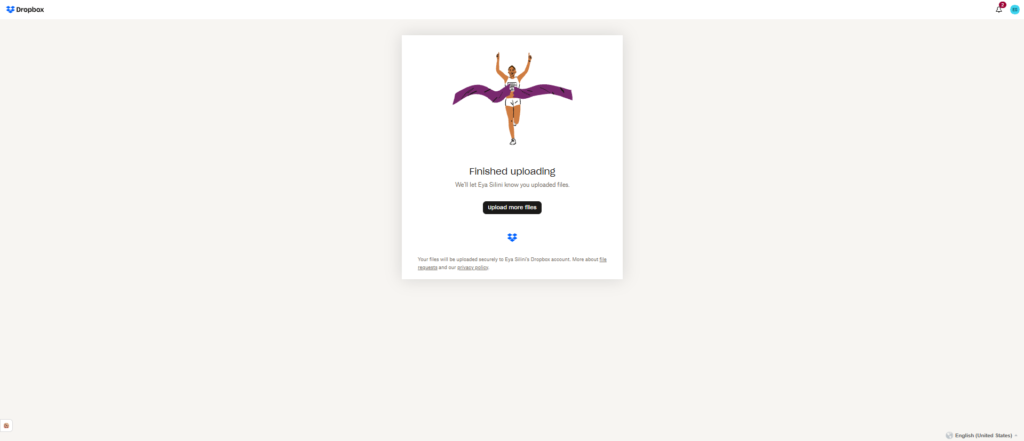
Also note that your file request link could be shared among several people and each person could submit the files and add their details.
As you can see below in the requester’s dashboard, we can see that 1 people from the client’s side have uploaded files.
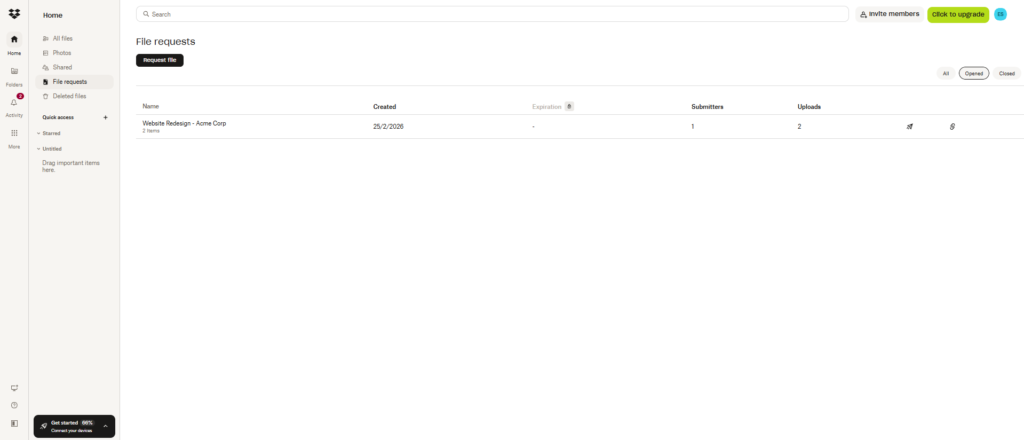
And just in case you are not sleeping in your Dropbox account (Thank God!) you will also receive notifications every time someone uploads new files.
Now you just have to log back into your dashboard to view the returned files.
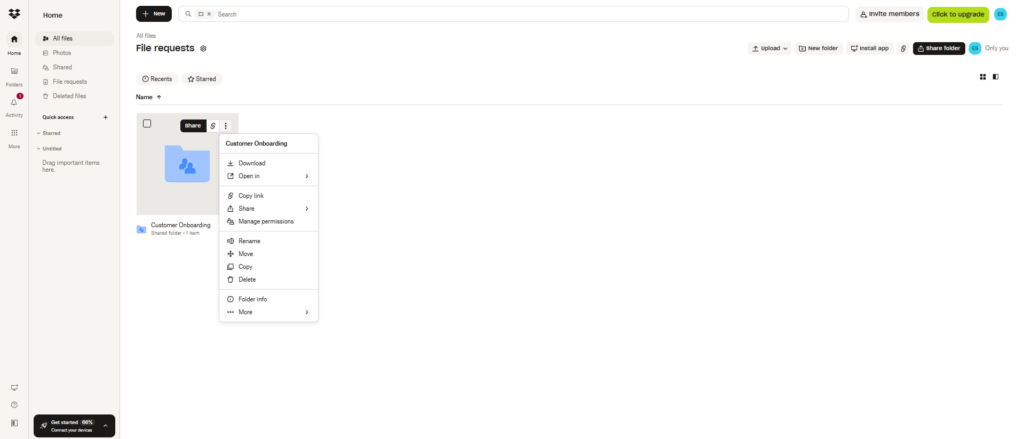
Each of your Dropbox files allows a number of actions that you can complete with a few clicks.
Here are the different actions available to you on each of your files:
– Upload: you could add another file to the folder
– Open: you could preview the submitted file in Dropbox in full screen
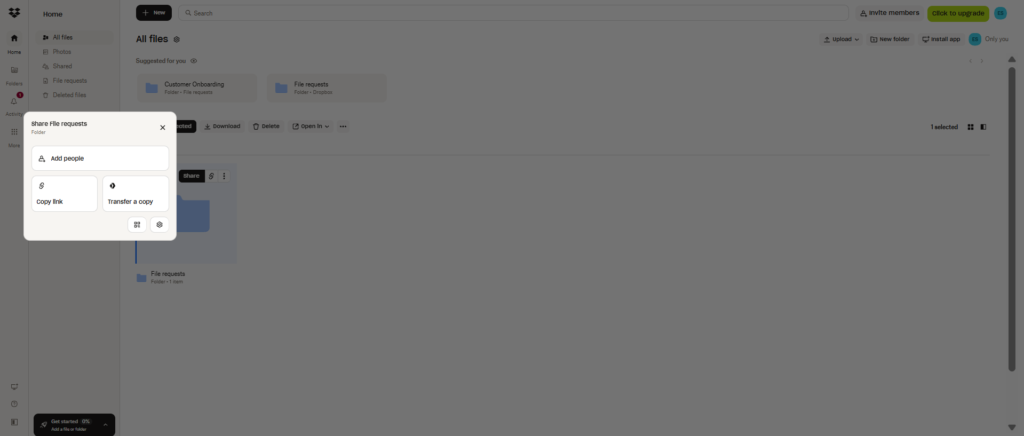
– Share: you could share a specific file with someone else from your team for example. Or even someone who doesn’t use Dropbox by adding their email (The person would need to be a Dropbox user or sign up for an account)
– Transfer: this is a nicer way to send files to someone who doesn’t have a Dropbox account, they can access the files in a page with a custom background of yours.
– Download: you can use this to download the file to your computer
– Move: allows you to reorganize the files in your current folder
– Copy: helps you duplicate the file
– Rename: allows you to change the initial name of the file.
– Delete: it does what it says
– Add comment: can allow you to comment on the file or tag teammates
– Pin to: will help you pin this file to another folder
– Star: if you want to mark the file as favorite
– Save as: is a smart way to change the file format
– Version history: history of changes made on this file

Now, assuming that you wanted to update your current file request, how would you go about it?
Head over to your File Request tab to edit anything you want.
You’ll just have to click on the 3 dots icons to edit your text and fix any mistake you may have done while creating your initial request.
And if you want to share it again with someone else. You just have to click on ‘Share’ to do so.
Within Dropbox, you can set up a few automation rules to simplify your work. Let’s discover a few of them.
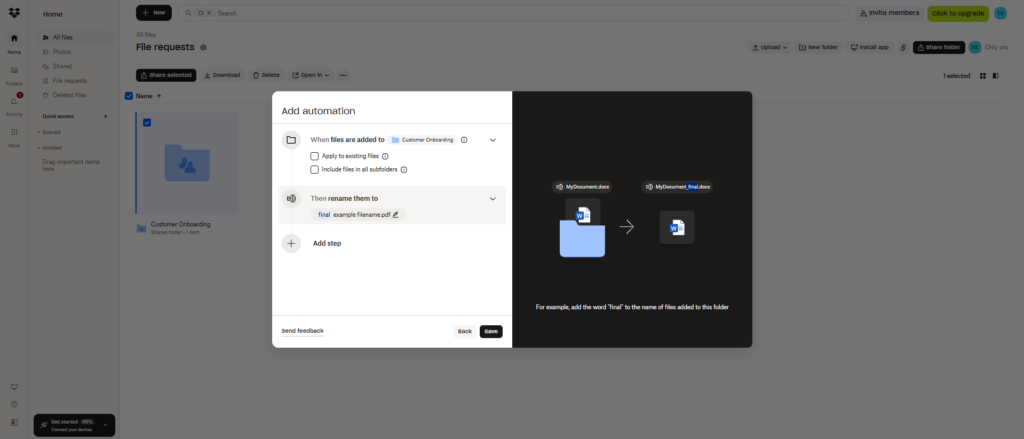
If you want to apply a specific title to each of the files you receive, it’s possible.
From the top of your Dropbox folder, click on the 3 little dots icons to set naming conventions for your files.
Available options are:
• Starting a file name with a date with various formats
• Capitalizing Initials
• Changing separators to Spaces, Underscores or Dashes
• Adding a parent folder name to the file name
This will allow you to go from this to that (see below):
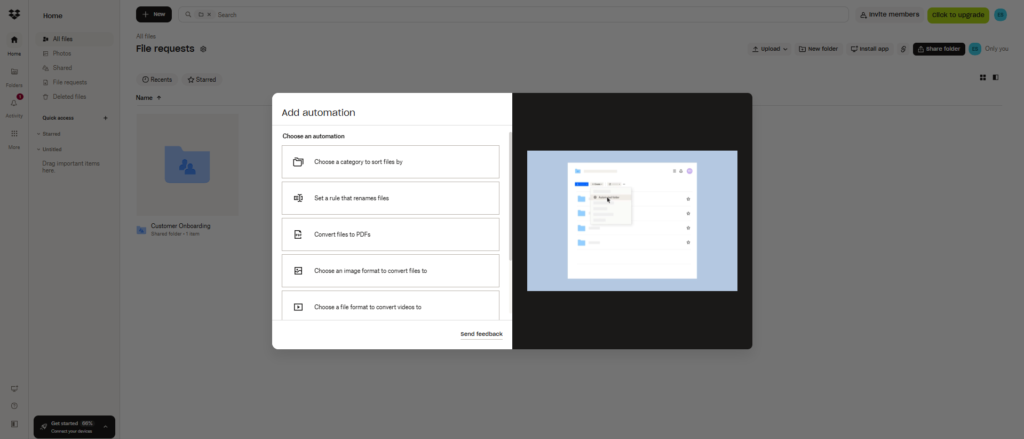
Not sure if you located this section, but under your Dropbox profile picture or icon, you have an ‘Automation’ section where additional automations are available.
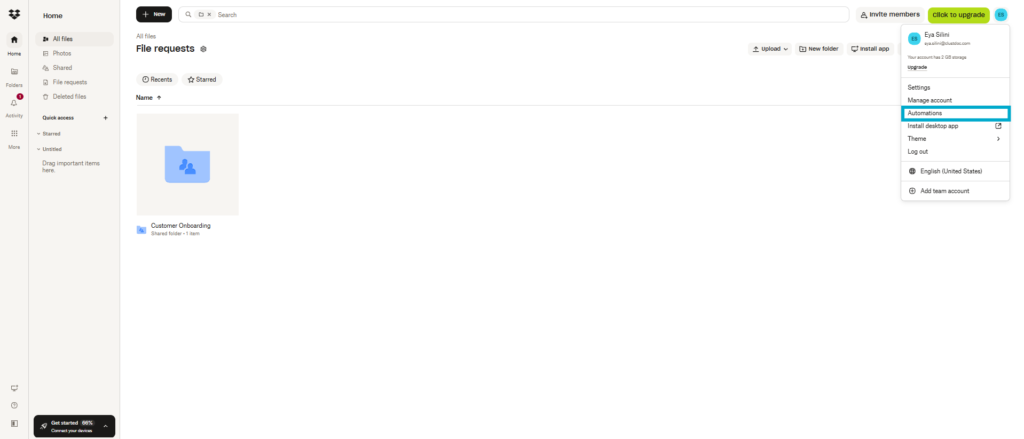
You can create more automations from this section of your account. Check out which automations you can create for your files:
• sort them based on category
• save them as PDFs
• Unzip them if applicable
• Rename them (as we just did previously)
• save them as images
• save them as videos
We’re done with our in-depth overview of Dropbox file request. Now, let’s move on to the Pros and Cons of this platform for B2B companies.
We love the fact that Dropbox and its file request feature are very easy to use. If you read the above (Congrats by the way), you already noticed how simple the app actually is.
Most of the options you’ll need to request files from clients are one click away from the Home screen, and you can’t miss anything.
For your clients as well, it’s pretty straightforward. They receive a link, click on it and upload files. You can’t make it less complicated.
As seen previously, Dropbox has been around for a long time.
They have 1,300 people with Design-related job positions. Yes, you read it right.
So, it comes as no surprise that the design and navigational experience are well-thoughts and optimized to save you useless clicks. The pages are clean and kept to that strict minimal, so you don’t have any distractions.
Dropbox was born as a desktop app and quickly made sure your files would be available from anywhere.
It’s pretty convenient to know that you and your team can access your files online, on your computer, your mobile, and your tablet, or on the web if you need to.
All devices are synchronized, which really helps to feel at home no matter the system you use.

So far, our review shows that the best use cases for Dropbox File request are mainly:
– Internal projects: Eg. Content team needs files from Marketing Manager
– One-off requests: Eg. Hey Donna, send me your CV and Resume
– Personal tech projects: Eg. Mum & Dad, I want to build a Hawaï trip album, send me yours!
For B2B companies needing to use it with clients, it seems less intuitive. We can already feel the frustration of a B2B service company like you or us, needing a professional solution to build digital client experiences that drive results.
Think of the following:
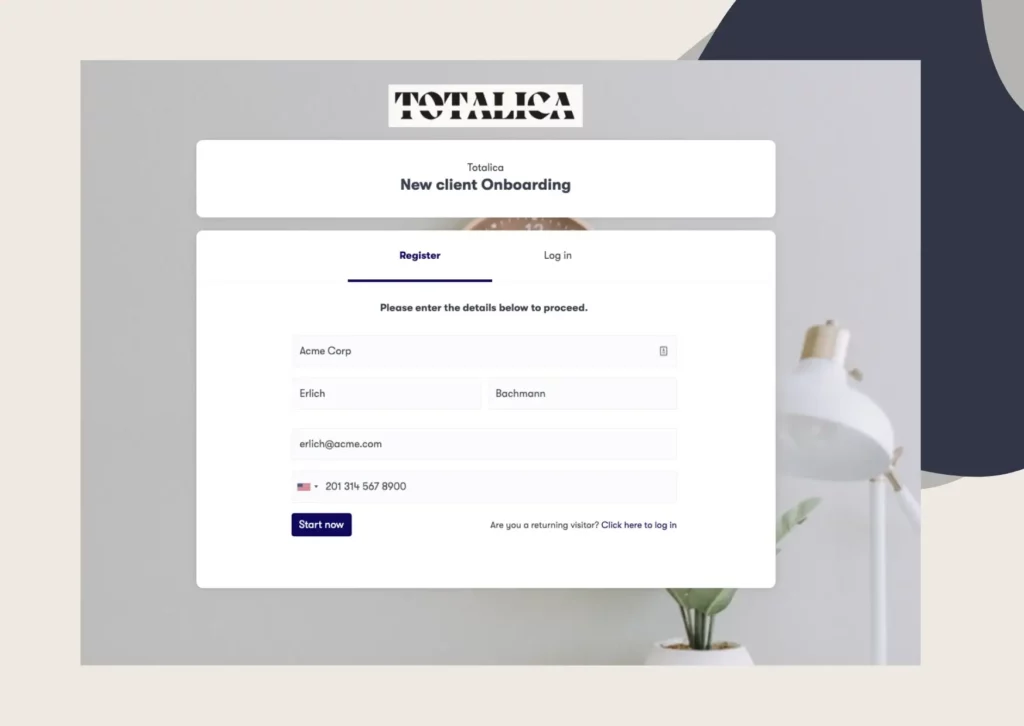
A new client onboarding, a student application, an online subscription, a loan application or even the above website redesign service that we used for our demo.
Customer experiences are sometimes more complex, that’s why you should be aware that Dropbox file request is not built to help you meet your sales KPIs or anything like that.

The above observation brings us to the question of pricing. I mentioned at the beginning of this guide that Dropbox costs on average €900/year for a team of 5.
Considering that the File request feature allows you to ask someone to add files to your Dropbox folder, you would probably need additional software to work with clients.
Let’s say that you needed to collect personal details, you’d then need an online form. If you needed to get documents signed, you could use the HelloSign option, but it seems to be limited to 3 docs /month.
And, you still need to switch to this other tool to handle your signed documents.
In the end, you’d probably need to bundle 4 to 5 business apps around your Dropbox file request module to provide a full client experience.
The final cost for you would probably be twice the above price, at least—for an asynchronous end-to-end user experience.
This doesn’t seem too suitable to B2B companies, where it’s critical you need to build trust with your clients and provide seamless experiences to reduce churn.

The Dropbox file request feature is a quick way to handle a very specific task within a bigger flow of business-related tasks: requesting files.
But you, me, and your team know that it doesn’t stop there.
After requesting files to clients, I am sure you’ve already experienced a number of back-and-forths to make sure you actually get the RIGHT file.
Sometimes, the client sends an incomplete file (Where is page 2?), in the wrong format (I said PNG), or an outdated version (Payslips too old sorry).
All these errors clutter your inbox and give you more work to do and create more friction than they should.
This is another limitation we see with the Dropbox file request feature if used by B2B companies. The actual file management and approval work that happens afterward is not possible, making you wonder why you even left your email inbox in the first place.

Although Dropbox allows you to comment on files, the feature is obviously made for internal use, such as adding notes to your files or pinging your teammates.
The conversations are threaded per file, and once again there is no way to see the big picture.
The short answer is THINK AGAIN.
Don’t get me wrong. Dropbox is still one of the best file-sharing platforms out there. At Clustdoc, we use it too, and we truly like it.
But the truth is that Dropbox and its File request feature are simply not great to manage clients more especially for B2B companies.
B2B companies’ client workflows require dedicated, professional solutions that will drive results and help them grow systematically.
Clustdoc is built exclusively for managing new clients from a single platform while supercharging your sales process. And you can still integrate it with your Dropbox if you want to.
Learn below how Clustdoc would replace your current Dropbox file request:
– Forms, file requests, spreadsheets, tasks, payments, eSignatures – What else?
– Customer-centric workflows
– Password protected onboarding portal
– Files approval/denial
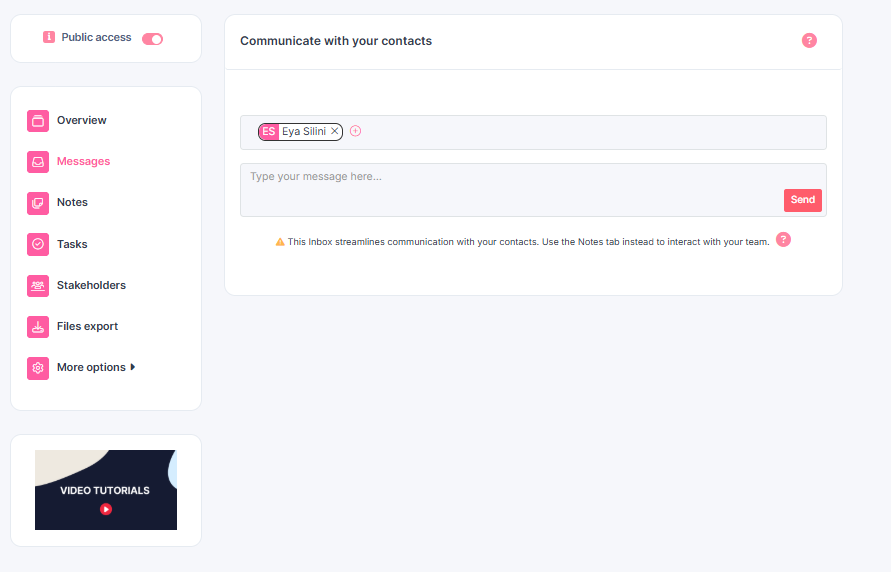
– Internal and external secure inbox
– Powerful automation
Clustdoc provides you with a full suite of proprietary features, allowing you to make sure you collect more than just files and get back to work faster.
It includes a file request module but also, a form builder, a task manager, a payment request module, and a legally-binding eSigning solution.
You won’t have to juggle between apps again.
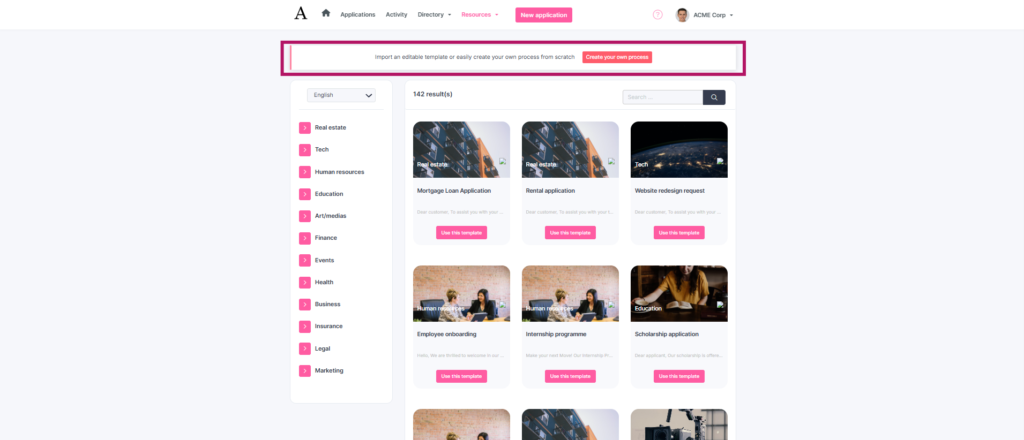
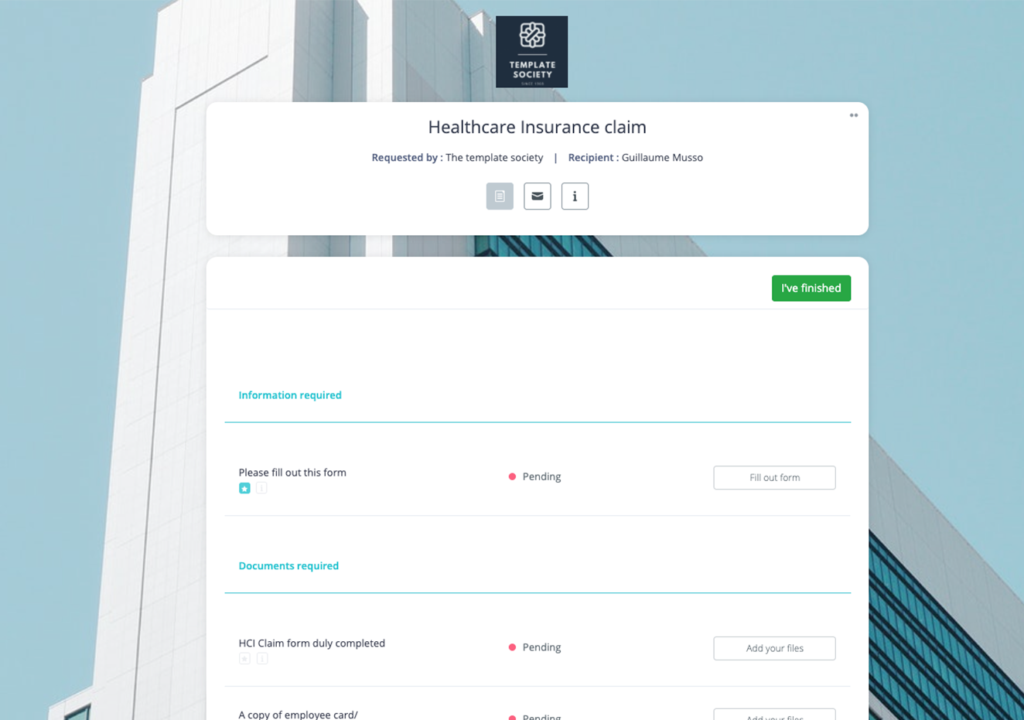
Using the above features, you’ll build client-facing workflows and run them from a secure branded portal. You can import industry-specific templates if you need help or build your custom workflow from scratch in minutes.
Your clients will be pleased to join a branded interface available on any device (computer, mobile, tablet) where everything they need to submit would be clearly described along with any instructions you may want to share with them.
They can message you from this platform and resume where they left effortlessly.
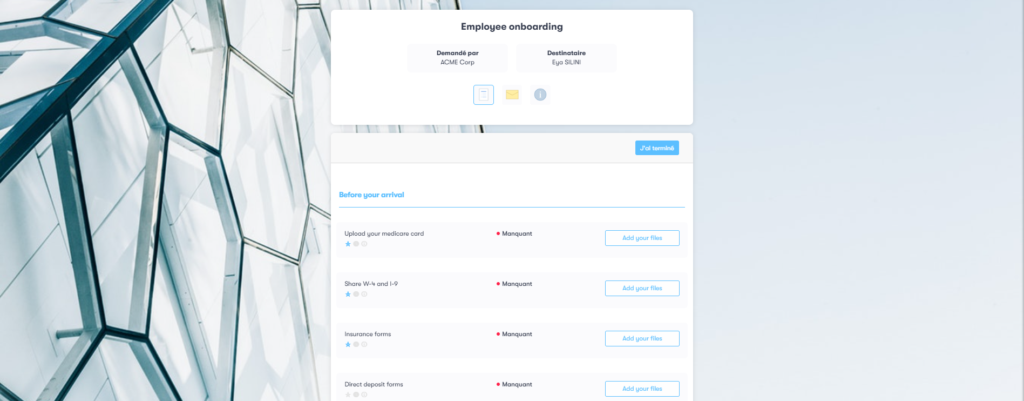
Clustdoc automatically organizes your client’s files in virtual records allowing you to review, approve or deny files easily.
This way, you and your client know exactly how things are progressing and what’s left. You’ll be amazed to see how this feature will increase your conversion rates and team productivity.
We mentioned that earlier. Cluttered inboxes can kill your team productivity and distract you from keeping up with your clients. That’s why Clustdoc takes care of removing from your inbox all client-related conversations and team interactions.
Our secure inbox gathers all your communications with clients, internal stakeholders and teammates.